In this tutorial I am going to show you how to create metallic text like the image shown below.
Step 1: Create a new file 500 pixels wide by 200 pixels high
Step 2: Hit "D" to set the foreground colour to black and the background colour to white
Step 3: From the filter menu select filter/noise/add noise and use these settings.
Step 4: From the filter menu select filter/blur/motion blur and use these settings
Step 5: Hit ctrl+F to apply the same filter again. Your image should now look something like this.
Step 6: Use the Horizontal Type Mask Tool add whatever text you want. Use a nice thick font like Impact or Arial Black. For this tutorial I am going to be using Impact.
Once you have finished typing click on the move tool and you should have a selection looking like this.
Step 7: Hit Ctrl+Shift+I to invert the selection.
Step 8: Right click on the background layer and select Layer from background and name it texture.
Step 9: With the texture layer selected hit Delete to remove the selection.
Step 10:Hit Ctrl+D to deselect it. Your image should now look something like this.
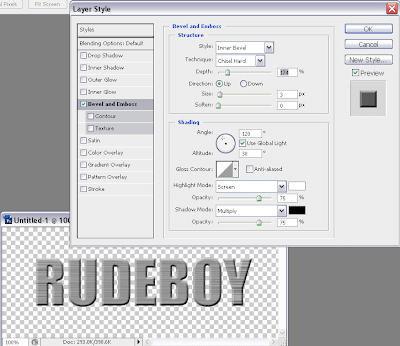
Step 11: With the texture layer selected go to the layer menu and select layer/layer style/bevel and emboss. I have used these settings but the settings may need to be adjusted to work with the font that you have chosen to use.


No comments:
Post a Comment